Sunday, May 29, 2011

How to make a Crossbow Prod (Limbs) from old saw blades

Below are a series of pictures showing the process of how to make a Crossbow Prod (Limbs) from old saw blades.

Basic Template  - prod can be 18" or up to 22"
depending on the saw blade you use

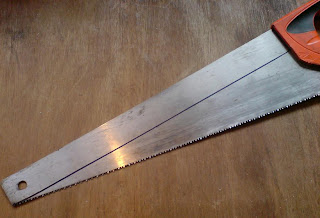
Any old saws will do the job for a prod (crossbow limbs)

How to mark out for the prod

Notches of the prod end parts.

Notches of the prod end parts.

Clamp the wood between two pieces of wood to use as a guide
to aid cutting with the angle grinder

This is the waste material.

How to make the string end caps from Aluminium,
cut along dot line, file to shape, drill holes

End caps in place (need a bit more filing still yet)

End caps in place (need a bit more filing still yet)
How to make Cross bow prod - this technique will produce a prod of around 50-65lbs draw weight when using 5 sections of 18" blade steel, longer sections and more parts will produce stronger prods, the draw length for this prod is about 7" inches.
Materials : 5 old saw blades, some 1/4" aluminium, 4 x bolts, locking nuts and washers, black electrical tape.
Tools for the Prod : Angle Grinder, Vice, safety gear, two pieces of wood (any length as long as its bigger than the saw blades), Marker pen.
End Caps : Drill, Files, hacksaw.

First thing to do is mark out the prod as shown above, clamp the saw between the wood as shown, I use screws and then I lay the whole thing on the floor and cut it that way, the saw blades will take a fair bit to cut, so it may take a few minutes to cut one blade (5-10mins possible)
Once roughly cut out put a section of blade in the vice and grind or file the edges smooth so they are not rough anymore, then using the grinder cut in the prod end grooves, do these things on all 5 sections.
You will then have the basic prod, but will still need the end caps for the string.

Cut two piece of 1/4 aluminum to the sizes shown above, cut out the basic shape and then using files shape it to the finished shape, drill the holes (about 4 - 5mm) the position may vary depending on where you cut the end groove on the saw blades.
Once the end caps are shaped you just need to prepare the parts.

What I do is get the 5 sections and tape them together with the tape, don't cover the whole prod , just do it in bands as wide as the tap itself, and leave the ends free so you can bolt on the end caps,

Once I have the tape on I then bolt on the end caps on the outside edge of the prod (bolt on either side, just make sure when you use it the end caps are on the outside)
Once bolted on, cut of any of the bolts that's stick out past the nuts and wrap the end in tape as shown above.

About the string : This size prod will be able to use a bought pistol prod string, but you can make one from most strong, non stretching string.

You should now have a full working Prod ready for your crossbow. I hope this tutorial helped.


Please leave a comment letting me know what you think and if you have any questions just ask. 

Saturday, May 28, 2011

How to make a Carbine Crossbow - Part 3 and 4

BELOW ARE PARTS 3 AND 4 OF THE MAKING OF A CARBINE CROSSBOW


Link to Trigger Mechanism, Nut release, Plans, Templates, Blueprints, Materials you will need,  front and rear sight plans  and the other videos parts (1 and 2) are here > - CLICK HERE


Please leave a comment letting me know what you think and if you have any questions just ask.

Sunday, May 22, 2011

How to make a Carbine Crossbow - Templates

Below are the plans for a simple carbine crossbow - ready to save and print on A4 paper


Front sight and prod holder -
Click to enlarge and right click to save


Trigger mechanism -
 Click to enlarge and right click to save

Crossbow handle -
Click to enlarge and right click to save

Butt plate -
Click to enlarge and right click to save

Nut and bolt spring -
Click to enlarge and right click to save

Trigger-
Click to enlarge and right click to save

Guard, sight block and front sight -
Click to enlarge and right click to save

Tape the pieces together as shown above
An easy to make Carbine Crossbow - Templates include trigger mechanism and all other parts.

and below is a video showing the making of this crossbow to help you make one yourself.

Materials list : 50lb or 80lb or 120lb draw weight crossbow prod - search Google for places that sell them

Or you can make a  prod by cutting handsaw blades into 45cm x 37mm sections using a angle grinder, cut in grooves at the end for the string and tape together in bundles of at least 5 (more details coming soon)

You will also need:

STOCK : Four plywood boards, 66cm x 16cm x 12mm or other wood

NUT : One aluminium block, 25mm x 45mm x 45mm , or any hard materials, including hard wood, plastics, other metals (you can use steel, but it will make this a very long hard job)

TRIGGER : One aluminium plate 7cm x 6cm x 12mm or some kind of hardwood this size.

SIDE PLATES: Four aluminium plates 12cm x 8cm x 2mm thick, or you can 3mm plywood for this.

SIGHT BLOCK : One aluminium plate 8cm x 5mm x 10mm , can be aluminium or tin or steel, must be some kind of bendable metal.

TRIGGER GUARD One aluminium plate 20cm x 20mm x 2mm, can be aluminium or tin or steel, must be some kind of bendable metal.

BACK SIGHT AND BOLT SPRING : One aluminium plate 16cm x 5cm x 2mm, can be aluminium or tin or steel, must be some kind of bendable metal.

FRONT SIGHT : One aluminium plate 10cm x 20mm x 2mm, can be aluminium or tin or steel, must be some kind of bendable metal.


Two Nut and Bolts 5cm long, 6mm thick, can be any kind of metal rod.(for trigger and nut)

One Square Nut and normal ended Bolt 6cm long, 7mm thick.(prod holder bolt)

One Nut and Bolt 25mm long, 3mm thick (for front sight)

At least 20 screws, 25mm long.

Some wood glue.
One Tension coil spring, 4mm thick or slightly less.

As far as I can remember this should be all materials you need.

BELOW IS PART 1 AND 2 OF THE MAKING OF THIS CROSSBOW


Please leave a comment letting me know what you think and if you have any questions just ask.

Tuesday, May 3, 2011

New Skull Knuckle Duster / Brass Knuckles


New Skull Knuckles Dusters - A deaths head type knuckle duster in the shape of a skull. designed by myself, based upon an old design I once saw in the collection of pics included on the "Brassknucklescollectorsclub" website,
This actual design is a one off (its slightly changed from the original designs) and is now my brothers, I gave it him for his 31st birthday.
As mentioned above, the design is that of a skull, and is made from a solid Aluminium sheet/plate, and features two oblong finger holes in the style of the "deaths head" knuckle duster, the detail on the knuckle duster is cut into the metal, including the teeth and even features nostrils

Weight is average due its size and it being made of Aluminium.
Features several makers marks - WC-11 - maker and year made, and 31.

Overall a absolute classic design and very attractive and one of my all time favorites and certainly one of my favourite designs, makes a great display piece and even better talking point and could be used if need be.

Dimensions - 120mm wide, 75mm high, 12mm thick, Finger hole is 45mm wide and 30mm high.


Please leave a comment letting me know what you think! Thanks.


Also Known as - Бокс (оръжие), Puny americà, Boxer (zbraň), Dyrnau haearn, Knojern, Schlagring, Puño de acero, Puño Americano, Altzairuzko ukabila, Nyrkkirauta, Tirapugni, ナックルダスター, Kastete, Kastet, Buku lima, Boksbeugel, Knokejern, Soco-inglês, Кастет, Boksar (orožje), Knogjärn, Muşta, 鐵蓮花, Knuckle dusters, knuckles,Brass Knuckles, Brass Knucks, Poing Americain